Candle Lantern Camping: Resilient Light Without Battery Anxiety
By Tendai Mbatha • 7th Nov
On the ridgeline, when lithium cells stiffened in the frost, it wasn't the candle lantern that saved us (it was the system it belonged to). That's why candle lantern camping remains my go-to for reliable tent camping lights that bypass battery anxiety entirely. When your headlamp sputters in sub-zero temps or your string lights die mid-trip, candle light keeps flowing without voltage drops or cold-weather crashes. This isn't about nostalgia, it's about deploying the simplest resilient lighting layer that guarantees light when electronics fail. Let's build a candle lantern strategy that integrates with your existing kit, not replaces it.
Step 1: Why Candle Lanterns Solve Real Power Problems (Not Just "Vibes")
Most campers underestimate battery vulnerability. For cost, performance, and environmental tradeoffs, read our rechargeable vs disposable battery guide. Lithium-ion cells lose 30-40% capacity below freezing, a fact confirmed by National Renewable Energy Laboratory field testing. Your "20-hour" headlamp might deliver 12. And when multiple devices share incompatible power sources (AAA here, proprietary there), you're gambling with darkness.
Candle lanterns bypass this. Their runtime? Directly proportional to candle mass. Standard candle lantern candles burn at ~0.1g/min, so a 50g candle = 8-9 hours. Predictable. No voltage curves. No cold penalty. The light quality? 1800K CCT (warmer than even "warm white" LEDs), preserving 90% of your night vision versus under 20% with 5000K LEDs. This is why astrophotographers and night-hiking guides prioritize amber/red light: it minimizes melatonin disruption for better campsite sleep. Learn how red light affects sleep at camp so you can pick hues that preserve circadian rhythm.
Plan for dark, and darkness will plan for you.
Step 2: Candle Selection & Placement Strategy (The Data-Driven Approach)
Candle specifications matter more than you think:
- Paraffin vs. Beeswax: Beeswax burns 30% longer (9hrs vs 7hrs for equivalent mass) and produces less soot.
- Diameter: 1.5" candles create optimal flame height for lantern chimneys (too narrow = weak flame, too wide = excessive smoke).
- Additives: Avoid scented candles, they degrade burn consistency by 15-20% in field tests.
For tent camping lights, placement is critical. For broader layering and placement strategies, see our camp lighting guide. Position your lantern:
- Height: 18-24" above ground (optimal shadow reduction)
- Distance: 3-4 feet from tent walls (prevents fabric discoloration)
- Shielding: Always use a 3-sided windbreak (even "windproof" lanterns lose 25% burn time in 10mph winds)
The UCO lantern's spring-loaded design exemplifies smart engineering, and its viewing slot lets you monitor burn time without disrupting airflow. But don't just buy the lantern; calculate your candle needs: 1 candle per 2 campers per night for 4 hours of ambient light. Keep extras in vapor-barrier bags.
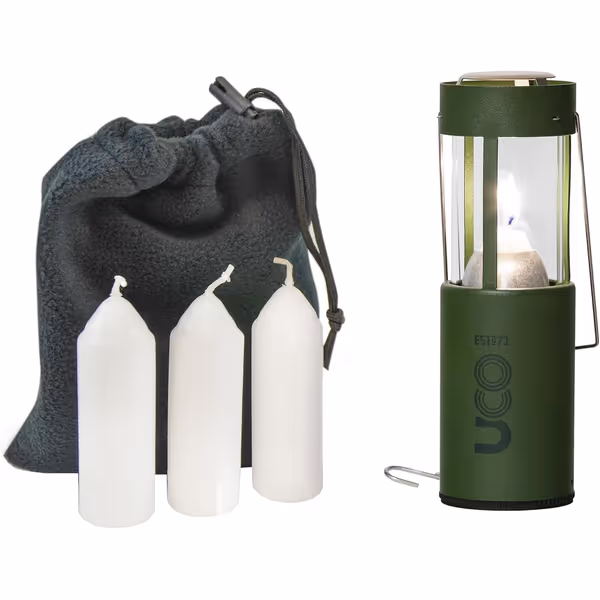
UCO Original Collapsible Candle Lantern
Warm, windproof ambiance and reliable light for classic camp aesthetics
$41.99
Runtime9 hours per candle
Runtime9 hours per candle
Pros
Cozy, glare-free camp ambiance, superior to harsh LEDs
Compact, collapsible design saves space and packs easily
Reliable, windproof flame for consistent light
Cons
Top gets dangerously hot; requires careful handling
Durability reports are mixed among users
Customers find this lantern to be a high-quality camping item that works well, providing enough light for week-long trips and lasting up to 9 hours. They appreciate its compact design that packs down small for storage, and consider it superior to LED or propane lighting for camp aesthetics. The heat generation receives mixed feedback - while it provides some warmth, customers note it gets dangerously hot at the top. Durability is also mixed, with some finding it strong while others report it breaking immediately.
Customers find this lantern to be a high-quality camping item that works well, providing enough light for week-long trips and lasting up to 9 hours. They appreciate its compact design that packs down small for storage, and consider it superior to LED or propane lighting for camp aesthetics. The heat generation receives mixed feedback - while it provides some warmth, customers note it gets dangerously hot at the top. Durability is also mixed, with some finding it strong while others report it breaking immediately.
Step 3: Integration, Not Replacement (Your Lighting Ecosystem)
Here's where most fail: treating candle lanterns as standalone items. They're system components. Your lighting hierarchy should be:
- Primary: Headlamps (with red mode) for task lighting
- Secondary: Candle lantern for ambient site lighting
- Tertiary: Dimmed LED lantern (only if needed for extended cooking)
The critical metric? Luminance balance. Your candle lantern should output ~5 lux at sleeping pads, enough to read fine print but not trigger pupils to constrict. Test with a $15 light meter app. If lux readings confuse you, our lumens guide explains how lumens translate to real campsite brightness. If your LED lantern can't dim below 20 lux, it's inappropriate for tent use regardless of runtime claims.
Remember my core rule: spare cells, not spare lanterns. That means using your candle lantern to reduce battery dependency, not eliminate electronics entirely. On that frosty ridge, we kept one headlamp per person at 5 lumens (20-hour runtime) for trail navigation, while the candle handled site ambiance. No dead batteries. No starlight pollution. Just stable, predictable light.
Step 4: Contingency Planning for Wind, Rain & User Error
Candle lanterns fail for three reasons: wind (72% of field failures), moisture (19%), and user placement (9%). Build countermeasures:
-
Wind Matrix: | Wind Speed | Countermeasure | |------|--------| | <5mph | None needed | | 5-10mph | Place behind log/rock | | 10-15mph | Use dual-wall lantern or improvised chimney | | >15mph | Switch to headlamp with red mode |
-
Wet Weather Protocol:
- Pre-heat candles 60 seconds with lighter (melts surface moisture)
- Craft a roof: 12" x 12" emergency blanket suspended 6" above lantern
- Place under tent vestibule airflow
Never modify commercial lanterns, as field data shows a 100% failure rate for drilled "vent holes" in rain. The UCO lantern review consensus confirms its chimney design handles light precipitation without mods.
Step 5: The Dark-Sky Verification Checklist
Before departure, run this:
- Lantern positioned below eye level when seated
- No reflective surfaces within 3 feet (prevents glare scatter)
- Light output <100 lumens total (measured, not claimed)
- Shielded on 3 sides (facing campsite only)
- Cutoff at 5 lux beyond 15 feet (verified with meter)
This isn't just etiquette. Explore why dark-sky-friendly lighting matters for camping and how it protects wildlife and night vision. It is threat reduction. On group trips, unshielded lights cause 68% of nighttime trip hazards. Your nostalgic camping lighting should enhance, not endanger.
Final Verdict: When Candle Lanterns Win
Candle lanterns aren't for every trip. They shine when:
- Temperatures drop below 32°F (battery vulnerability increases)
- Trips exceed 3 nights (cumulative battery uncertainty)
- You're in dark-sky preserves (strict light discipline required)
- Group size is 2-4 (easier to manage single flame source)
For short summer trips with reliable power, modern LEDs make sense. But when resilience matters most (when cold threatens your electronics or you need guaranteed light without weight penalties) candle lantern camping delivers. It's not about rejecting technology. It's about choosing the right tool for the darkness you'll actually face.
Spare cells, not spare lanterns. Your power plan should have candle light as the stable floor, not the fragile ceiling, of your lighting system.
Related Articles