Best Multi-Device Charging Lights: Power Hub Lanterns Tested
By Amara Patel • 14th Jun
When you start comparing multi-device charging lights and so-called power hub lanterns, you realize most of them promise more than they can deliver, but a few, chosen carefully, can simplify your whole camping device charging plan instead of complicating it. If you want model-by-model results, see our best lantern power hubs comparison.
This guide is for people who want calm, dark-sky-friendly light and reliable power for phones, headlamps, and small electronics, without hauling a trunk full of random banks and cables.
Spend less, waste less, light with intention and care.
Problem: Your "Power Hub" Lantern Isn't Really a Hub
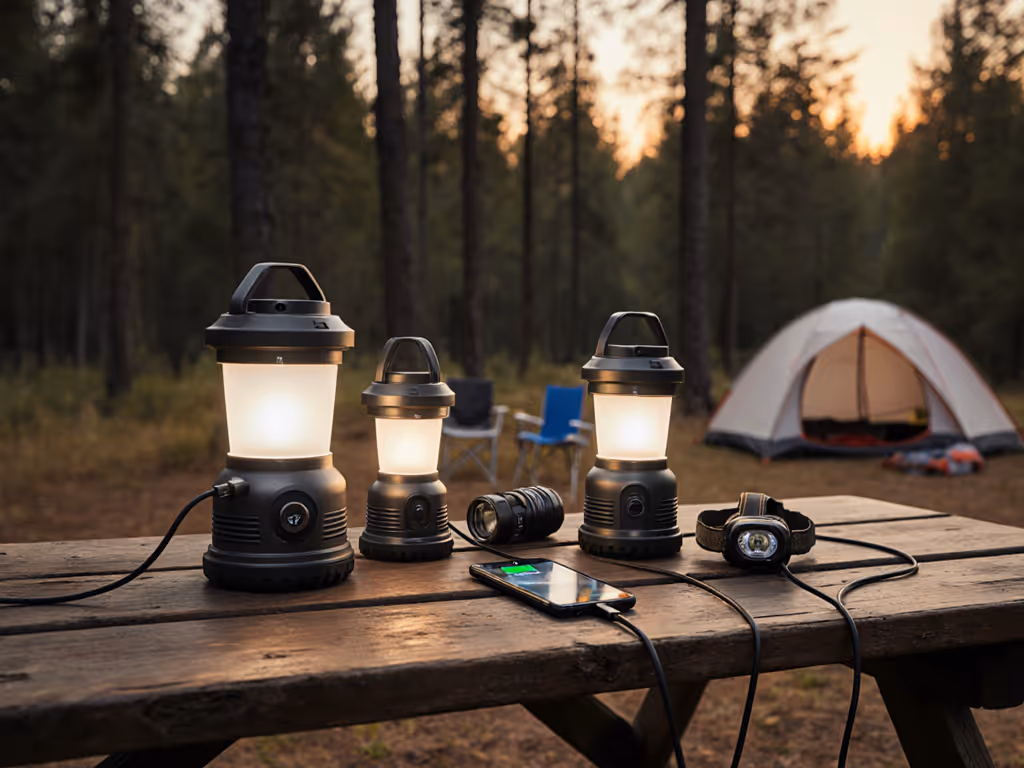
Most power hub lanterns are marketed as if they can light camp and keep everyone’s devices topped off for days. In practice, a lot of them barely manage one night of pleasant light and a couple of phone top-ups before limping.
Here’s where things usually go wrong.
1. Battery anxiety and mismatched runtimes
You’ve seen this combo:
- Headlamps that last 3–4 nights on low.
- String lights that sip power.
- A lantern with an integrated power bank that drains in one long evening.
Because the lantern and bank share a single battery, you’re constantly deciding: Do I keep camp cozy or save the last 20% for a phone emergency? That’s not a system; that’s a tug-of-war.
2. Inflated specs and unclear electronics charging capacity
Many lanterns list:
- Big, round numbers: 10,000 mAh, 20,000 mAh.
- "Up to 200 hours" runtime.
- Vague phrases like "charge your phone multiple times!"
But:
- mAh is rated at the internal battery voltage, not at USB output, and conversion losses mean you rarely get the full number as usable electronics charging capacity.
- "Up to 200 hours" is almost always at a moonlight mode you will never use as your main camp light (a common problem with rechargeable lights in general).[1]
And very few brands show honest runtime graphs at realistic brightness levels.
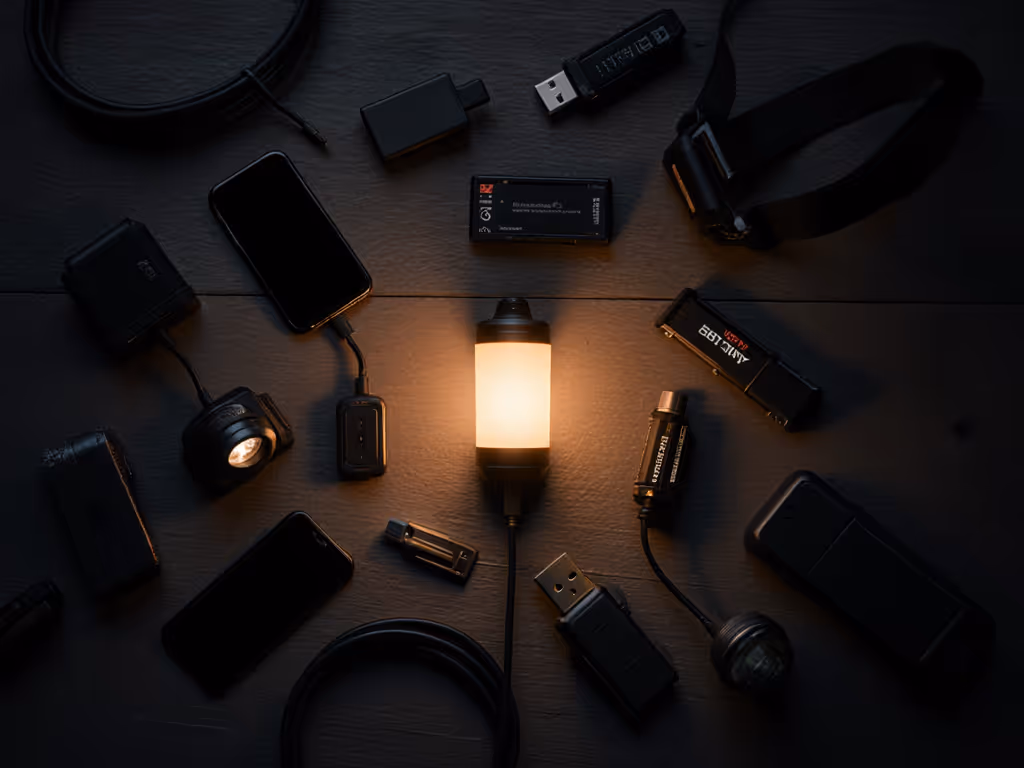
3. Cable chaos and port mismatch
You’re aiming for a one-cable ecosystem, but your lantern shows up with:
- Micro-USB charging (still!).
- USB-A output only.
Best-practice guidance for charger lights is to prefer USB-C over micro-USB, both for easier plugging and better long-term compatibility.[5] Yet many "modern" lantern hubs are stuck a decade back.
4. Light that ruins the night you came for
You want quiet, warm ambience and starry skies. Instead you get:
- Cool-white 6000-6500 K glare that nukes night vision.
- Hotspots right at eye level.
- UIs that require cycling through turbo and strobe to reach low or warm modes.
Some LED charger-style lights skip critical specs like CRI and CCT entirely (one of the red flags experts call out when evaluating portable lighting).[5]
5. Solar expectations that don’t match reality
A few power hub lanterns add tiny integrated solar panels or promote solar charging accessories. Off-grid charger testing consistently shows that:
- Small panels produce far less usable power in real conditions than their "ideal" wattage would suggest.
- Shading, angle, and clouds cut output dramatically.[14]
Relying on a lantern’s palm-sized panel for serious multi-night charging is a recipe for disappointment. For field-tested data, read our solar charging efficiency comparison.
Agitate: How This Fails in the Field
Let’s walk through a typical weekend with the wrong hub lantern.
Night 1: Everything looks fine
- Lantern at 75–100% brightness for 4 hours at camp.
- Two phones each top up ~40%.
- One headlamp charges from 30% to 100%.
Battery indicator still shows two bars, so you feel safe.
Night 2: The math catches up
- Same 3–4 hours of comfortable camp lighting.
- One more phone top-up.
Now the lantern battery is under 25%. The group still has:
- Phones at 40–60%.
- Headlamps at mixed levels.
- A camera that’s lower than expected after long exposures.
You dim the lantern more than you’d like, ration phone use, and start eyeing that "emergency" power bank you’d hoped not to touch.
Night 3: Hard choices
The lantern can either:
- Run at a pleasant brightness for 1-2 hours, or
- Fully charge one modern smartphone once.
You can’t have both. You either:
- Sit in a dim, slightly miserable pool of light to save power, or
- Nuke the rest of the battery finishing off a phone charge and rely on headlamps for the rest of the trip.
This is exactly the pattern that made me rebuild my own kits years ago after a windy coastal camp devoured everyone’s lanterns by night two. Same budget, same group size, different choices around battery allocation and diffusers, and the anxiety just disappeared.
The core issue wasn’t "not enough gear." It was no clear power plan and a lantern trying to play too many roles.
Solve: Turn Your Lantern into a Calm, Predictable Power Hub
Instead of asking, "What’s the best power hub lantern?" ask a better question:
"What specific job should my power hub lantern do in my kit, and what should it not do?"
Step 1: Decide the lantern’s job in your system
There are three sensible roles for power hub lanterns in a modern kit:
- Light-first, backup charging
- Priority: beautiful, low-glare area light.
- Charging: emergency phone or GPS top-ups only.
- Good for: backpackers, minimalists, astro-campers.
- Balanced dual-purpose lighting
- Priority: 2-3 nights of area light plus routine phone top-ups.
- Charging: 1-2 phones and a headlamp per night.
- Good for: couples, small families, weekend car campers.
- Power-first, lantern as a bonus
- Priority: act as the central integrated power bank for several devices.
- Charging: phones, radios, cameras, maybe a tablet.
- Light: mostly for kitchen/table, not whole-camp illumination.
- Good for: guides, educators, group organizers, van/overland rigs.
Once you choose a role, everything else (capacity, ports, brightness) gets much clearer.[1]
Step 2: Do simple, honest battery math
You do not need a spreadsheet (though I’m the kind of person who enjoys one). A quick reality check is enough.
1. Estimate device usage per night (conservative, real-world):
- Smartphone: 15-25% per day if mostly offline and in airplane mode.
- Headlamp with 18650 cell: ~5-10 Wh over a few nights unless you blast turbo.
- Small camera or action cam: 5-10 Wh/day if you shoot heavily.
2. Translate power bank capacity to something meaningful
Most lanterns quote capacity in mAh at 3.6-3.7 V. Roughly:
- 5,000 mAh ≈ 18 Wh usable.
- 10,000 mAh ≈ 35-40 Wh usable.
- 20,000 mAh ≈ 70-75 Wh usable.
Assuming ~80-85% efficiency from internal battery to USB output (a typical figure in off-grid charger testing), you can estimate how many total phone-equivalents or headlamp charges that realistically supports.[14] To choose the right cells for your setup, compare rechargeable vs disposable batteries.
3. Subtract what the lantern itself consumes
This is the part most people skip.
- A lantern at 100-150 lumens (comfortable, warm area light) may draw 1-2 W.
- Run for 4 hours = 4-8 Wh per night.
- Over 3 nights, that’s 12-24 Wh, often ½ to ⅓ of a 10,000 mAh pack’s usable capacity.
Whatever remains is your true electronics charging capacity.
Step 3: Specs that matter (and which to ignore)
When you evaluate multi-device charging lights, focus on the handful of specs that directly affect safety and usability.
Experts in rechargeable lighting recommend a stepwise process: define primary use, set minimum lumens and runtime, decide on battery and charging type, and evaluate lifecycle and repairability.[1] Combined with charger-light best practices,[5] you get this checklist.
Non-negotiables for modern power hub lanterns
-
Ports & standards
-
USB-C input at minimum; USB-C in/out strongly preferred for a one-cable ecosystem.[5]
-
Avoid micro-USB unless you already carry it for another critical device.
-
Battery transparency
-
Stated capacity in mAh and Wh (or at least mAh at 3.7 V).
-
No vague "long runtime" claims without numbers.[5]
-
Light quality
-
Warm CCT: ~2700-3500 K for camp ambience.
-
CRI ≥ 80; ≥ 90 is ideal for cooking and first aid.
-
Deep dimming down to true "nightlight" levels.
-
Beam control & diffusion
-
Frosted globe, shade, or built-in diffuser to prevent hotspots.
-
Directional modes or shades so you can keep light on your site, not your neighbors.
-
UI and lockout
-
Direct access to low; no forced blast through high/turbo.
-
Reliable lockout for travel so bags don’t arrive with a dead "hub."
-
Durability & serviceability
-
At least basic IP rating (e.g., splash-proof) stated in the specs.[5]
-
Ideally, replaceable 18650 or 21700 cells or a user-replaceable pack.
-
Sensible thermal behavior; avoid products with user reports of "gets hot quickly" or sudden dimming under load.[5]
What to mostly ignore:
- Max lumens (unless you’re doing search & rescue). Your usable mode is the 20-200 lumen range.
- Tiny built-in solar panels (treat them as trickle-charge only).[14]
- RGB party modes, strobes, or "scene" lighting.
Step 4: Pick the right archetype for your trips
Here’s a comparison based on typical 2-4 night trips, assuming moderate device use and a separate, modest power bank in the system.
| Archetype | Battery size (approx.) | Primary role | Good for… | Tradeoffs |
|---|---|---|---|---|
| Compact light-first hub | 3,000–5,000 mAh | Cozy lantern, emergency top-ups only | Solo/duo backpacking, astro trips | Won’t support heavy phone use; relies on separate bank for real charging |
| Balanced dual-purpose lantern | 8,000–12,000 mAh | Main camp light + routine phone/headlamp top-ups | Most couples and small families car camping | Heavier; needs honest brightness discipline to last 3–4 nights |
| Power-first basecamp hub | 15,000–25,000+ mAh | Central charging with useful lantern attached | Group camps, guides, van/overlanding | Bulkier; better paired with additional lightweight area lights |
This is where my bias shows: budget is a feature.
Instead of buying one huge, expensive all-in-one lantern and expecting miracles, I’d rather see you:
- Choose a balanced dual-purpose lantern with good light quality and UI.
- Add one simple, robust 10,000-20,000 mAh USB-C power bank.
- Make headlamps your primary task lights, ideally all on 18650/21700 cells.
Total cost often matches a single flagship "smart hub," but your system is more modular, repairable, and easier to scale up or down.
Step 5: Make it dark-sky-friendly and group-friendly
Capacity and ports are only half the story; the other half is how your lantern behaves at camp.
For dark-sky and neighbor etiquette
- Run warm or amber modes by default; avoid cool-white unless you’re doing detailed repairs or first aid.
- Use the lowest mode that lets people move safely. Deep dimming stretches runtime and preserves night vision.
- Shield the lantern: tuck it under a picnic table, use a homemade shade (paper bag, silicone shade, or thrifted diffuser), or hang it just above head height with a frosted diffuser.
For kids and light sleepers
- Treat the lantern as "living room" light early in the evening.
- Switch to individual headlamps or tiny path markers after quiet hours.
- Use the lantern’s lowest mode in a corner as a nightlight only if needed.
For mixed groups and programs
- Keep UIs simple and consistent across lanterns and headlamps.
- Brief the group: show them where low mode is, how to lock out devices, and agree on "no turbo in faces."
These are small social details, but they’re what make shared camps feel calm instead of chaotic.
Step 6: A simple pre-trip power hub checklist
Here’s the kind of checklist I keep with my gear bin.
Before every trip
- Top up:
- Power hub lantern to 100%.
- Main power bank(s) to 100%.
- Standardize cables:
- Pack 2-3 quality USB-C cables (one slightly longer for cooking area).
- One short USB-A to whatever legacy device you still need.
- Label & test:
- Label lantern and bank with capacity in Wh and your "typical nights" expectation.
- Run lantern for 2 hours on planned evening brightness at home; verify remaining battery matches your assumptions.
On trip
- Use a priority order for charging:
- Critical safety/communication devices.
- Headlamps / small task lights.
- Phones.
- Cameras/tablets last.
- Keep batteries warm overnight in cold temps (inside a stuff sack at your feet) to reduce capacity loss.
- Log at least once: "Night 1: lantern at X brightness for Y hours, Z% battery left." This becomes gold for future planning.
After trip
- Recharge to about 40-60% if storing for more than a month (better for Li-ion health). For step-by-step storage and cleaning tips, see our LED light longevity guide.
- Note any annoyances: port covers that pop open, confusing button presses, runtimes that felt too short. These become your criteria for the next upgrade.
Actionable Next Step: Design Your Own Power Hub Lantern Role
Instead of hunting endlessly for a mythical "best" lantern, take 10 minutes to sketch your actual needs.
- Choose the lantern’s role
- Light-first backup, balanced dual-purpose, or power-first basecamp hub.
- Write down your minimum specs (in plain language):
- "3 nights, 3-4 hours/night of warm area light for 2-4 people."
- "Enough spare capacity to fully charge 2 phones per day."
- "USB-C in/out, warm CCT, deep dimming, no RGB, no strobe."
- Audit what you already own:
- Headlamps: cell type, runtime, port.
- Existing power banks: capacity, ports.
- Any lanterns/string lights: brightness, tint, runtime.
- Fill just the real gap:
- If you already have a solid 20,000 mAh bank, your lantern can be smaller and more light-focused.
- If your banks are weak but your lighting is solid, a power-first hub lantern might make sense.
- Test on a one-night local camp or even a backyard evening before relying on it for a long trip.
If you keep the bill of materials small, the roles clear, and the ports standardized, you’ll end up with a kit where you always know what’s charged, what each piece is for, and how long it will last. That’s the quiet confidence we’re after:
Spend less, waste less, light with intention and care.
Related Articles